How this site was built
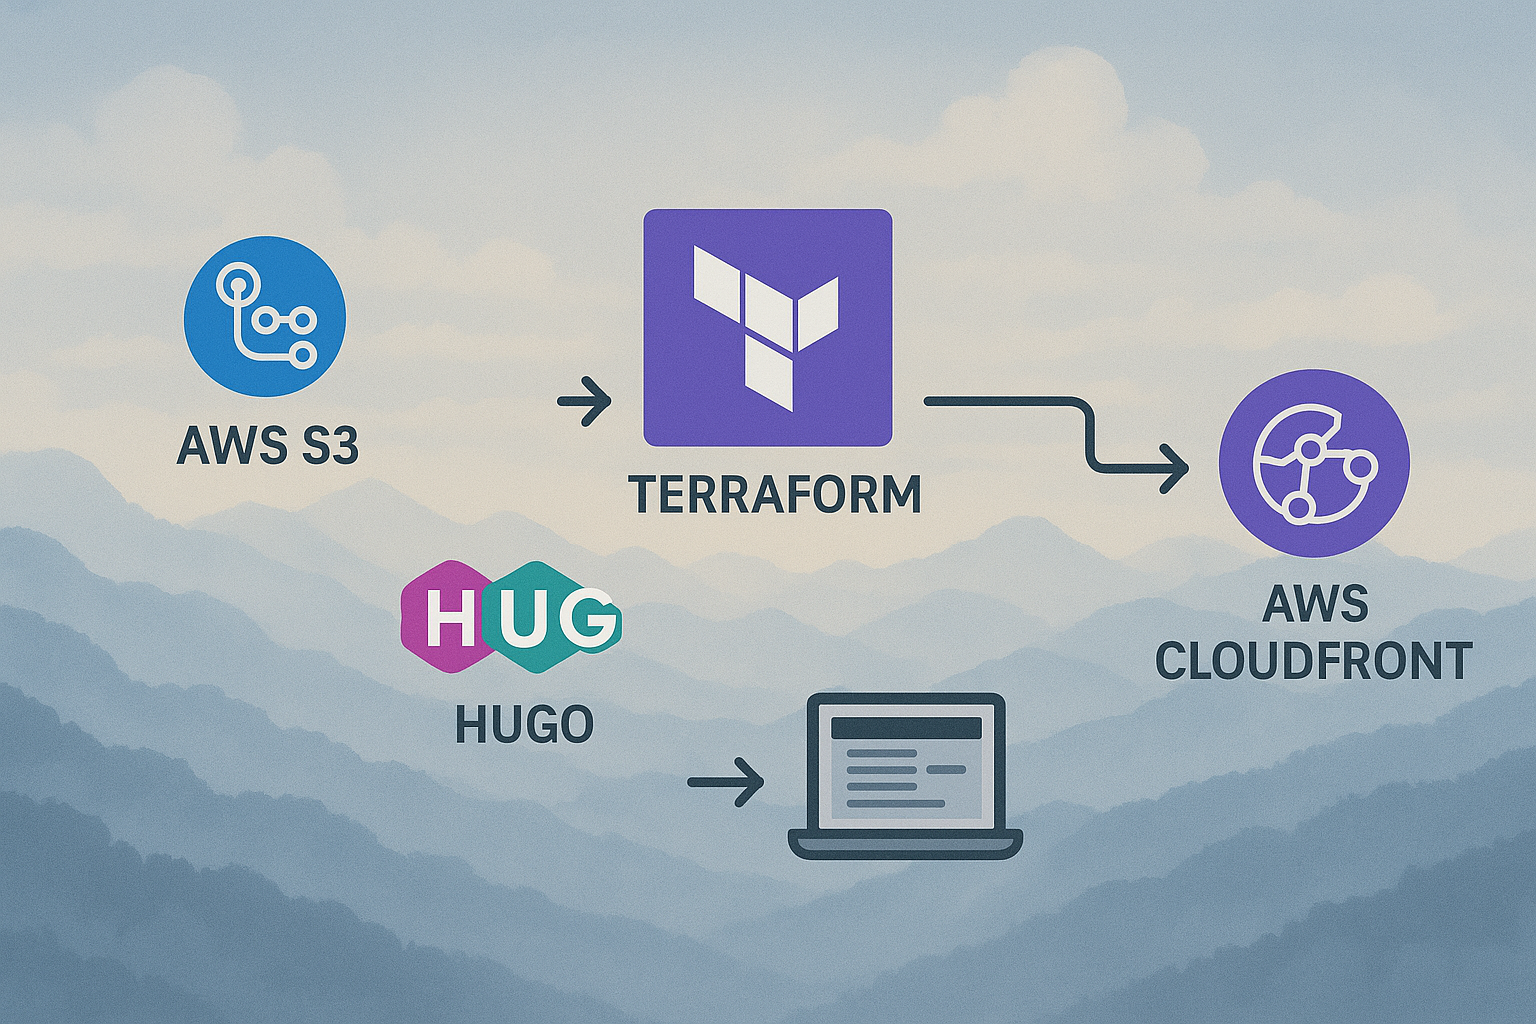
When I decided to build my own site, I knew I wanted something fast, scalable, and modern — not just in terms of the tech stack, but also in the way it’s managed and deployed. This post walks you through exactly how my site (Cloudy Mountains) is deployed using Hugo, AWS (S3 + CloudFront), Terraform, GitHub Actions, and OIDC authentication. I’ll show you the challenges that I had and how to solve them properly.
⚒️ Why Hugo?
I chose Hugo because:
- It’s blazing fast. Seriously, sub-second build times.
- It has zero runtime dependencies — everything is compiled at build time.
- It’s flexible enough that I could build a custom theme from scratch, and for that, I used a cool AI-powered IDE called Cursor to speed up the process.
Initially, I started using a free theme for my Hugo site, but it turned out to be quite challenging to get everything working exactly as I wanted — both for me and the AI. While I eventually managed to modify the theme to match my vision, it resulted in one massive CSS file that was difficult to manage and slowed down the process of adding new features. Debugging issues was also confusing and time-consuming. In contrast, starting from scratch allowed me to simply prompt ideas (often getting the desired result in the first iteration), and the outcome was clean, fast, and easy to maintain (Also, understandable for me, I have some technical knowledge, but not in html and css).
🧱 Infrastructure with Terraform
I manage everything in AWS using Infrastructure as Code (IaC) with Terraform. Why? Because:
- I can track all infrastructure changes in version control.
- I have the necessary experience.
- It makes my deployments audit-friendly and consistent.
Here’s what Terraform sets up for me:
- An S3 bucket to host the static files (public read disabled; CloudFront handles access).
- A CloudFront distribution in front of it to cache and deliver content globally.
- An CloudFront function to fix a subtle but annoying issue with subpage URLs (more on that next).
🏗️ Using Public Terraform Modules
To simplify and speed up the process, I use public Terraform modules for some parts of the infrastructure. These modules are pre-built and tested, making it easy to set up resources without writing everything from scratch. However, it’s crucial to pin the module version to ensure stability and avoid unexpected changes that could lead to infrastructure issues.
For example:
module "s3-site-bucket" {
    source  = "terraform-aws-modules/s3-bucket/aws"
    version = "4.9.0"

    bucket = "my-site-bucket"
    acl    = "private"
    # Additional configuration...
}
Pinning the version ensures that even if the module is updated, your infrastructure remains consistent and reliable. This is the recommended approach for production environments.
🔁 The CloudFront + index.html Trick
If you’ve deployed static sites before, you might’ve run into this:
- You want
example.com/blog/to loadexample.com/blog/index.html. - CloudFront’s Default Root Object helps, but only for the root, not nested paths.
To fix this, I added a tiny CloudFront function (via Terraform) that (Actually copied from the examples here):
- Checks if the URI ends with a
/. - If it does, it rewrites the request to append
index.html.
function handler(event) {
  var request = event.request;
  var uri = request.uri;
  // Check whether the URI is missing a file name.
  if (uri.endsWith("/")) {
    request.uri += "index.html";
  }
  // Check whether the URI is missing a file extension.
  else if (!uri.includes(".")) {
    request.uri += "/index.html";
  }

  return request;
}
🛠️ Handling 403 Forbidden Errors
When setting up CloudFront with S3, you might encounter 403 Forbidden errors. This typically happens when CloudFront tries to access a file that doesn’t exist in the S3 bucket — for example, when a user navigates to a non-existent page.
To address this, you can configure a custom error response in CloudFront. This allows you to redirect users to a friendly error page or handle the issue gracefully. For instance, you can set up CloudFront to return a custom 404 page stored in your S3 bucket whenever a 403 error occurs.
  custom_error_response = [
    {
      error_code            = 404
      response_page_path    = "/404.html"
      response_code         = "404"
      error_caching_min_ttl = 10
    },
    {
      error_code            = 403
      response_page_path    = "/404.html"
      response_code         = "404"
      error_caching_min_ttl = 10
    }
  ]
🔄 CI/CD with GitHub Actions + OIDC
The GitHub workflow I use is simple — not ideal, but it works for now. It allows me to have automated deployments, ensuring that every change I push to the repository gets deployed seamlessly to AWS without manual intervention.
Instead of using the hugo deploy mechanism, I deploy the site by manually copying the files from the public folder to the S3 bucket using the AWS CLI. This approach is straightforward and aligns with my familiarity with AWS tools.
Here’s the command I use:
aws s3 sync public/ s3://my-site-bucket --delete
This ensures that the contents of the public folder are mirrored in the S3 bucket, removing any outdated files and keeping the deployment clean and consistent. While hugo deploy offers automation, I prefer this method as it gives me more control over the process.
Why OIDC? Because it means:
To do this securely and properly, I use OIDC (OpenID Connect) to authenticate GitHub Actions to AWS. The OIDC provider is also created via Terraform.
- No long-lived AWS access keys in GitHub secrets.
- Temporary credentials are granted only when the workflow runs.
It’s the officially recommended way by AWS and GitHub.
🔚 Wrapping Up
I chose this setup (AWS S3 + CloudFront) because I have extensive expertise in AWS cloud services as I mentioned, which allows me to configure and optimize the infrastructure effectively. Additionally, this setup is cost-efficient, highly reliable, and scalable, making it ideal for hosting a static site with global reach and minimal maintenance overhead.
Additionally, while using AI tools can significantly streamline the process of building production-grade services, it’s important to note that having foundational knowledge is still crucial for certain aspects. For example, designing a site with HTML and CSS can be achieved with minimal expertise, thanks to AI assistance. While the site may not look like it was built by a professional website designer/builder, it demonstrates that even with limited knowledge, a lot can be accomplished. Moreover, being a static site ensures there is no risk of leaking sensitive information, making it a safe and practical choice for personal projects.However, writing applications in languages like Python or Go requires a solid understanding of the language’s syntax, paradigms, and best practices to ensure the code is robust, secure, and maintainable, when using AI assistants.